How to Delete a Web Server on Paas.id

Introduction
Sometimes, you want to remove your server on Paas.id or you want to reconnect your server to Paas.id
In this guide, we will learn about deleting a web server on Paas.id.
Prerequisites
- Have installed a web server on Paas.id
Step 1 - Login to your Paas.id Account
Login to your Paas.id account via https://dash.paas.id/auth/login.
Step 2 - Navigate to Server Setting Page
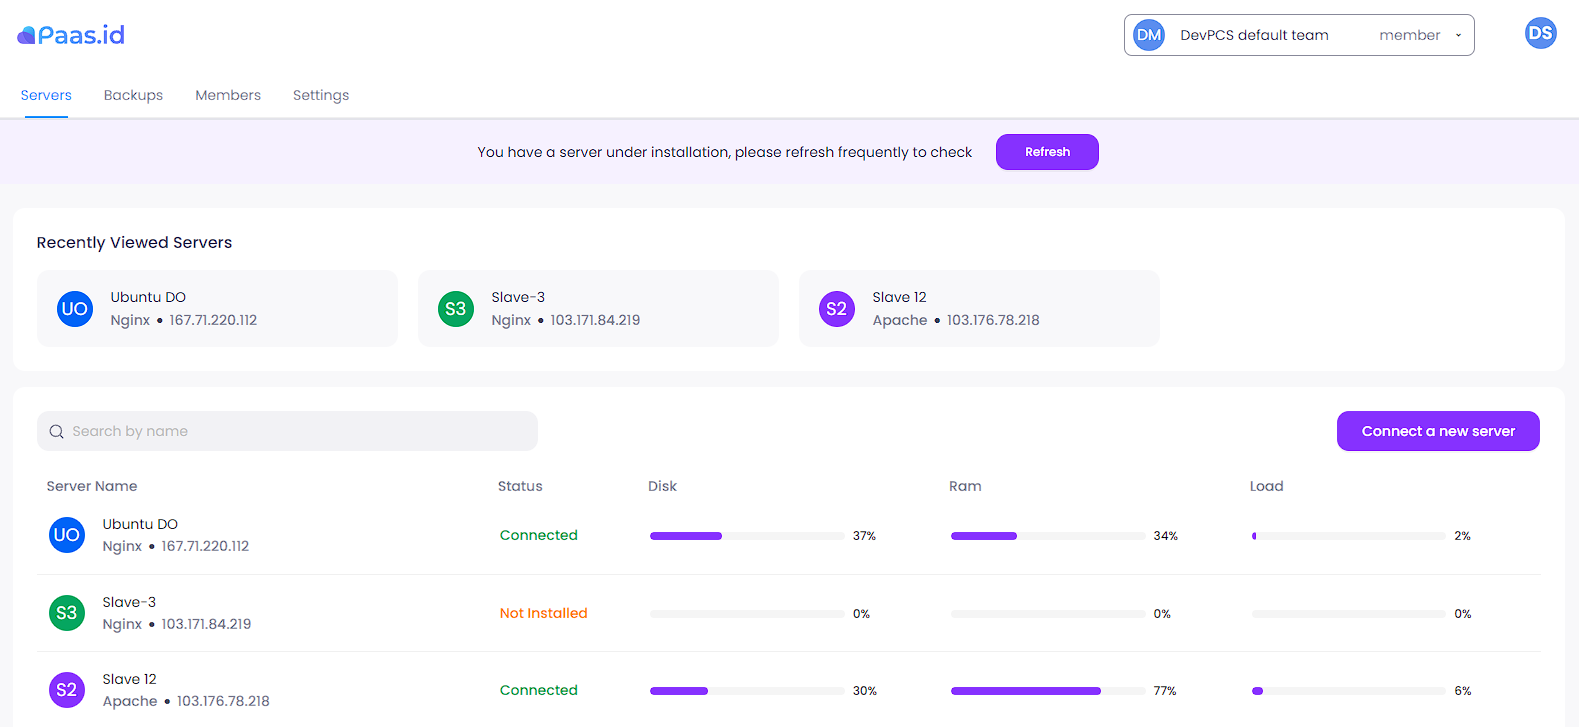
From the servers page, you need to open the server details page by clicking on the server name.
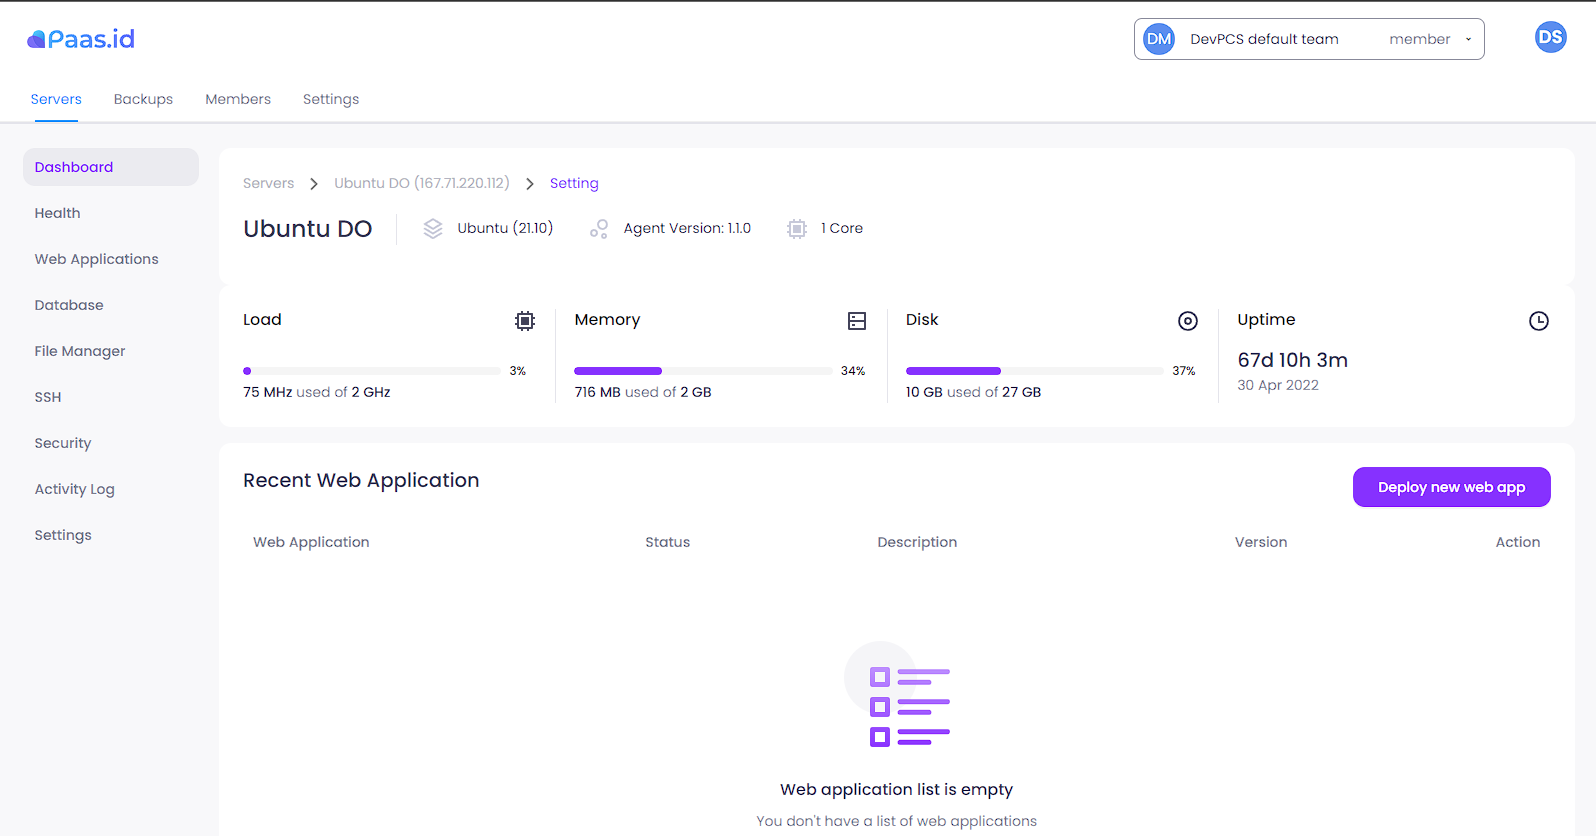
On the server detail page, you need to open the server settings page by clicking "Settings" menu on the left sidebar.
Step 3 - Delete the Server
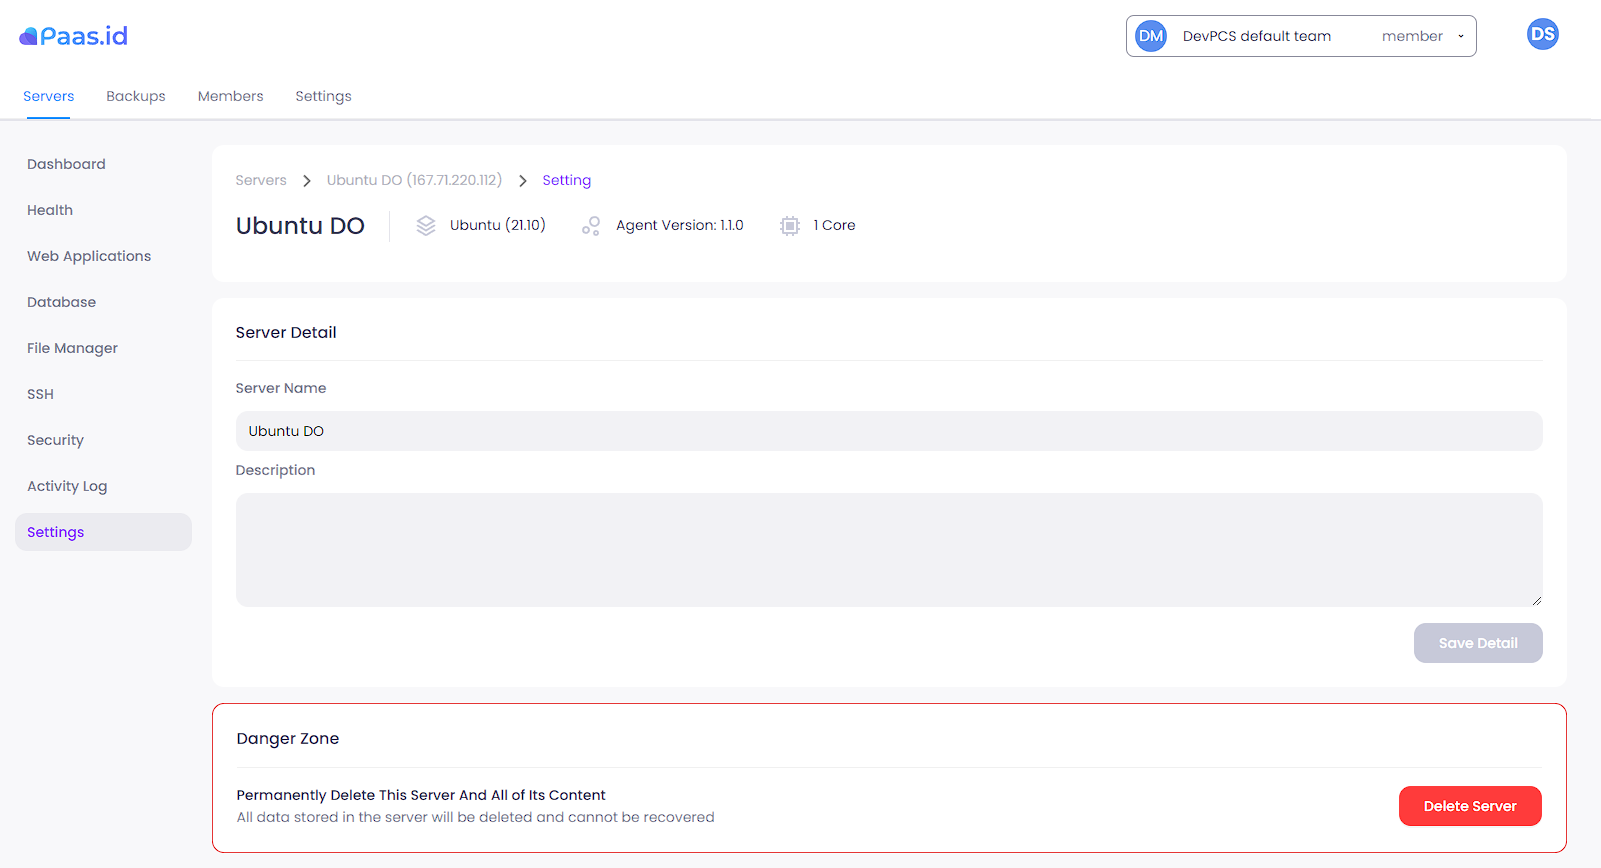
On the server settings page, click the "Delete Server" button on the bottom-right side.
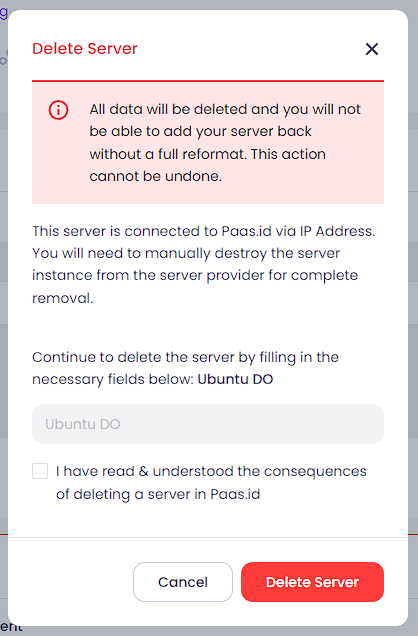
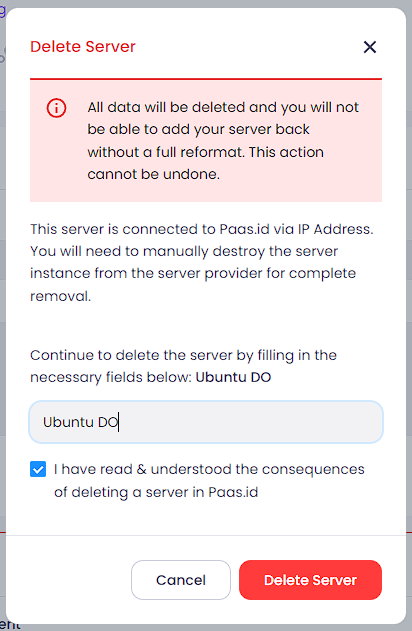
A confirmation message will appear, follow the instruction and don't forget to toggle on the agreement. Click the "Delete Server" button, if there is no error you will be directed to servers page.
Step 4 - Wait until the Deletion Process is Complete
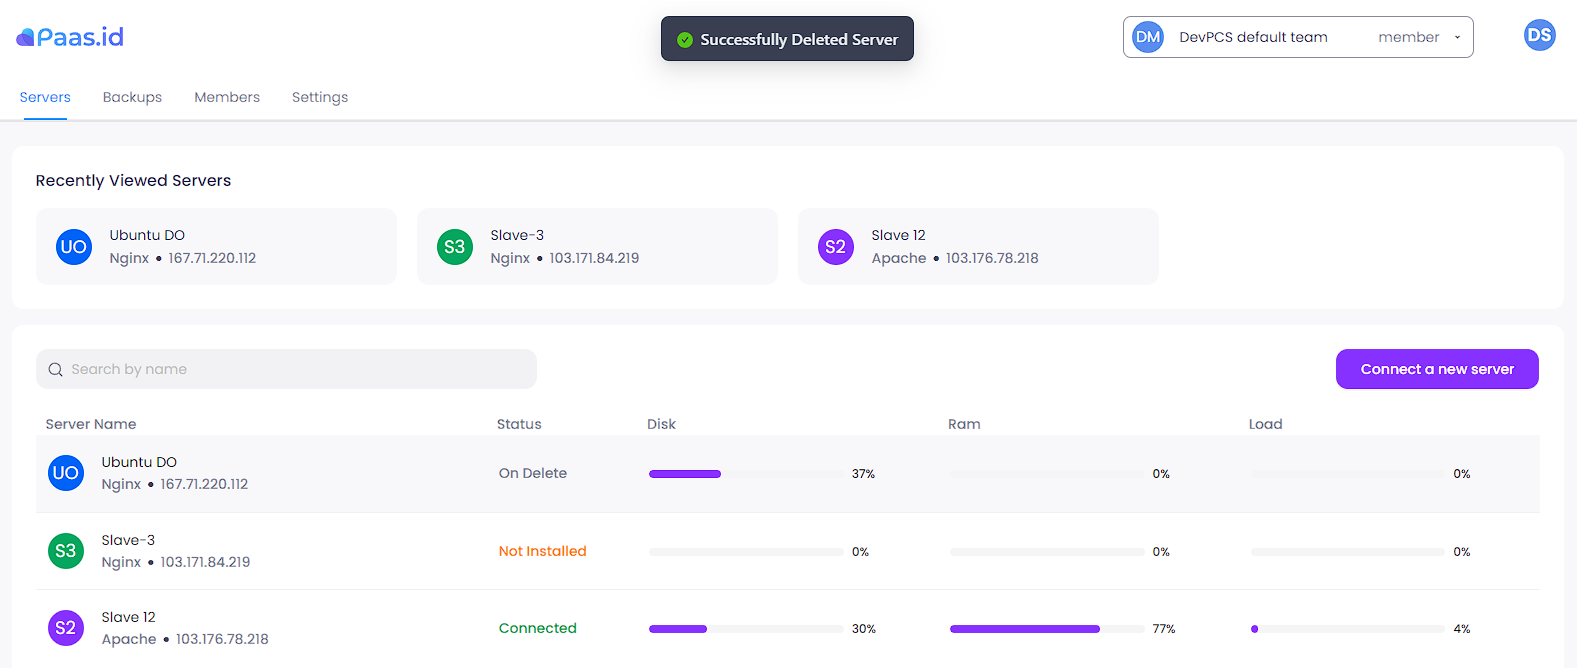
When the deletion process is started, your server status will turn to "On Delete", please wait until the server is removed from the list.
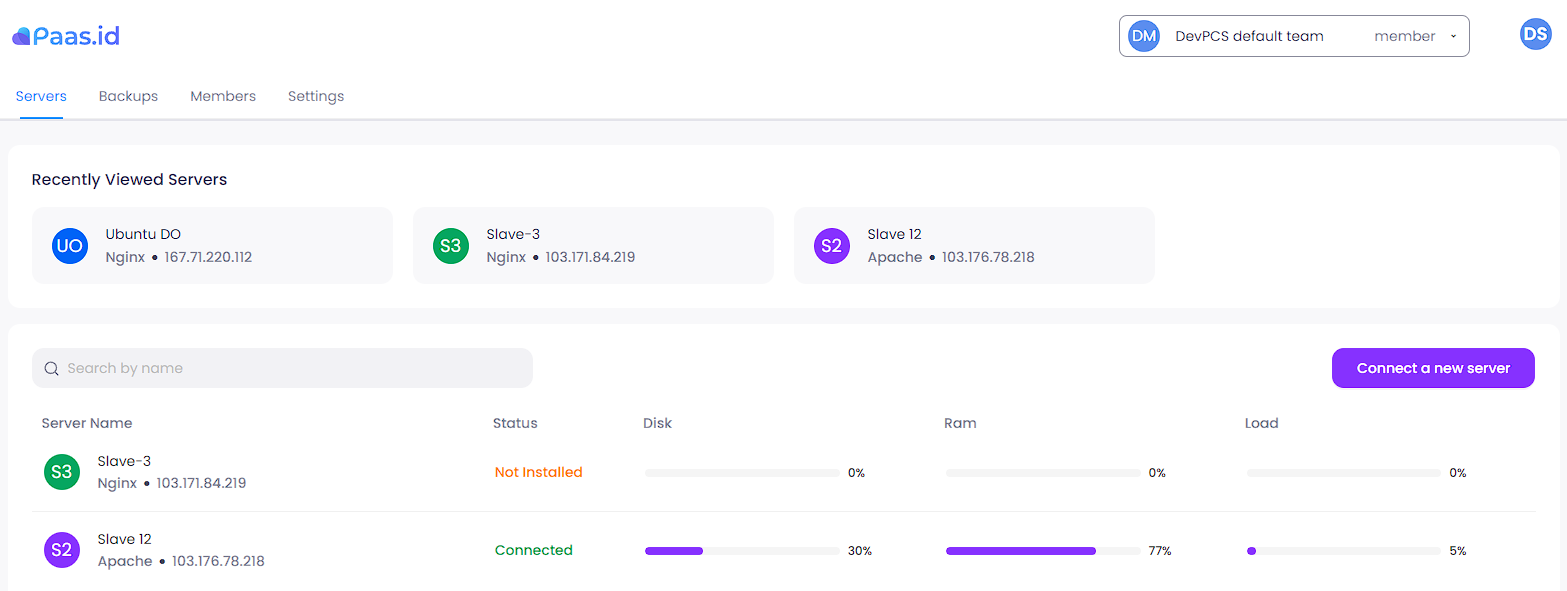
Now the server is deleted from Paas.id.