How to Deploy CodeIgniter Project on Paas.id

Introduction
CodeIgniter is a free and open-source web application framework written in PHP.
In this guide, we will learn about deploying a CodeIgniter project on Paas.id.
Prerequisites
- Have installed a web server on Paas.id
- Have created an empty web application on Paas.id
- Know how to manage files using file manager on Paas.id
- Know how to manage databases using phpMyAdmin on Paas.id
Step 1 - Upload CodeIgniter Project via File Manager
In this guide, we will deploy a to-do list application. The application are documented in the URL below.
 joshtmags
Firstly, navigate to the empty web application directory on the file manager.
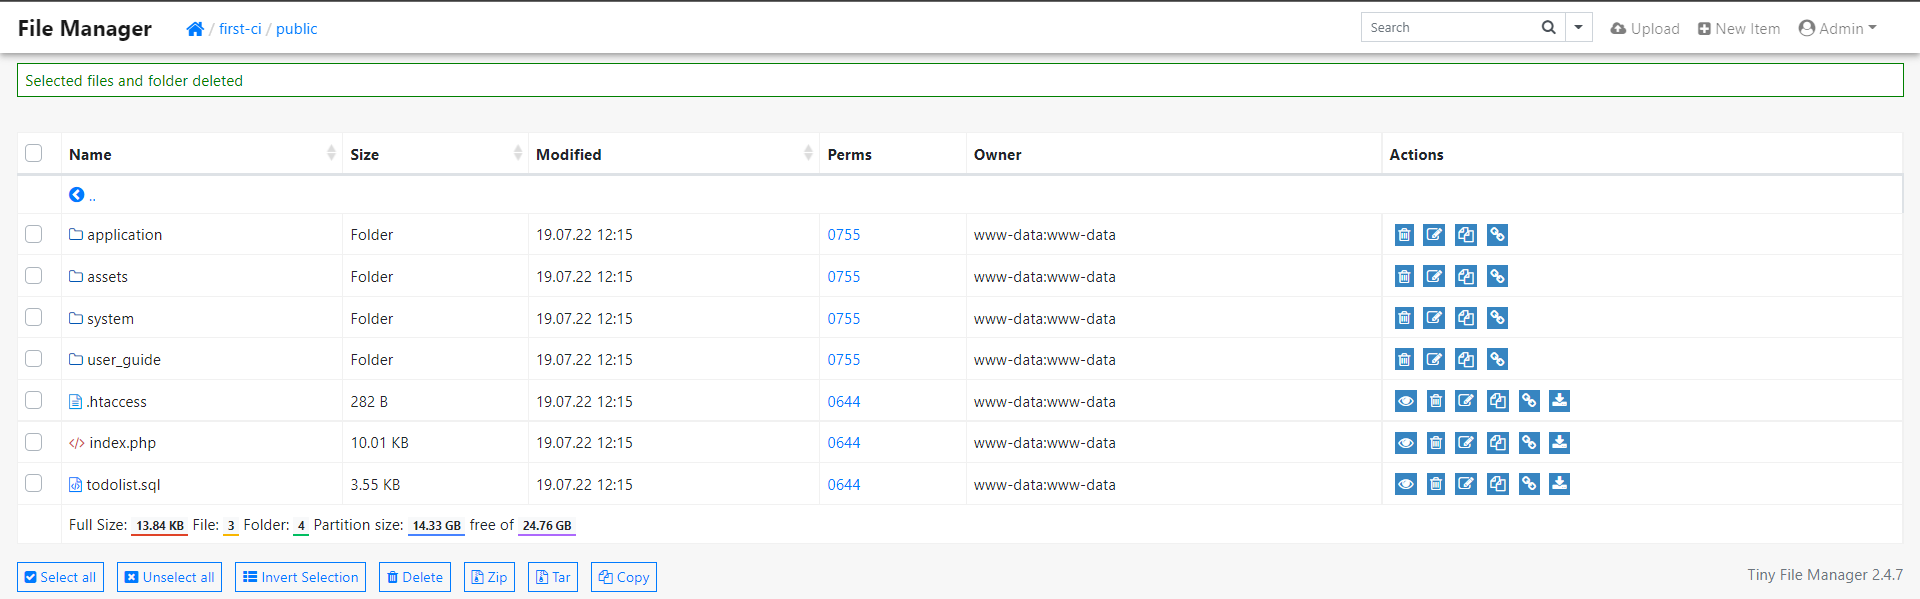
Open the public folder and make sure the folder is empty by deleting all files.

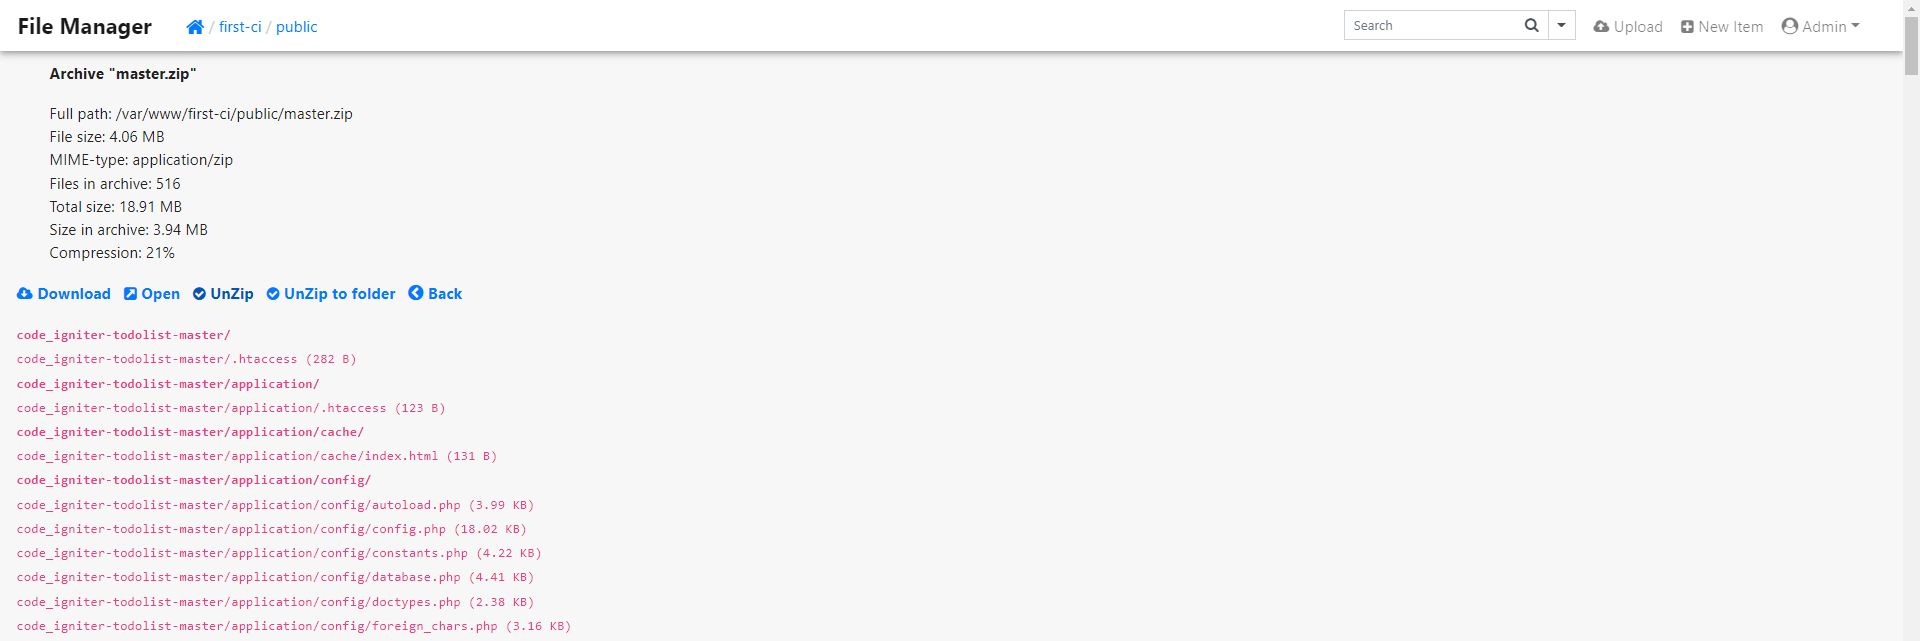
Upload the CodeIgniter project file or you can upload from URL by using the URL below.
https://github.com/joshtmags/code_igniter-todolist/archive/refs/heads/master.zip

View the file and extract them to the current directory.

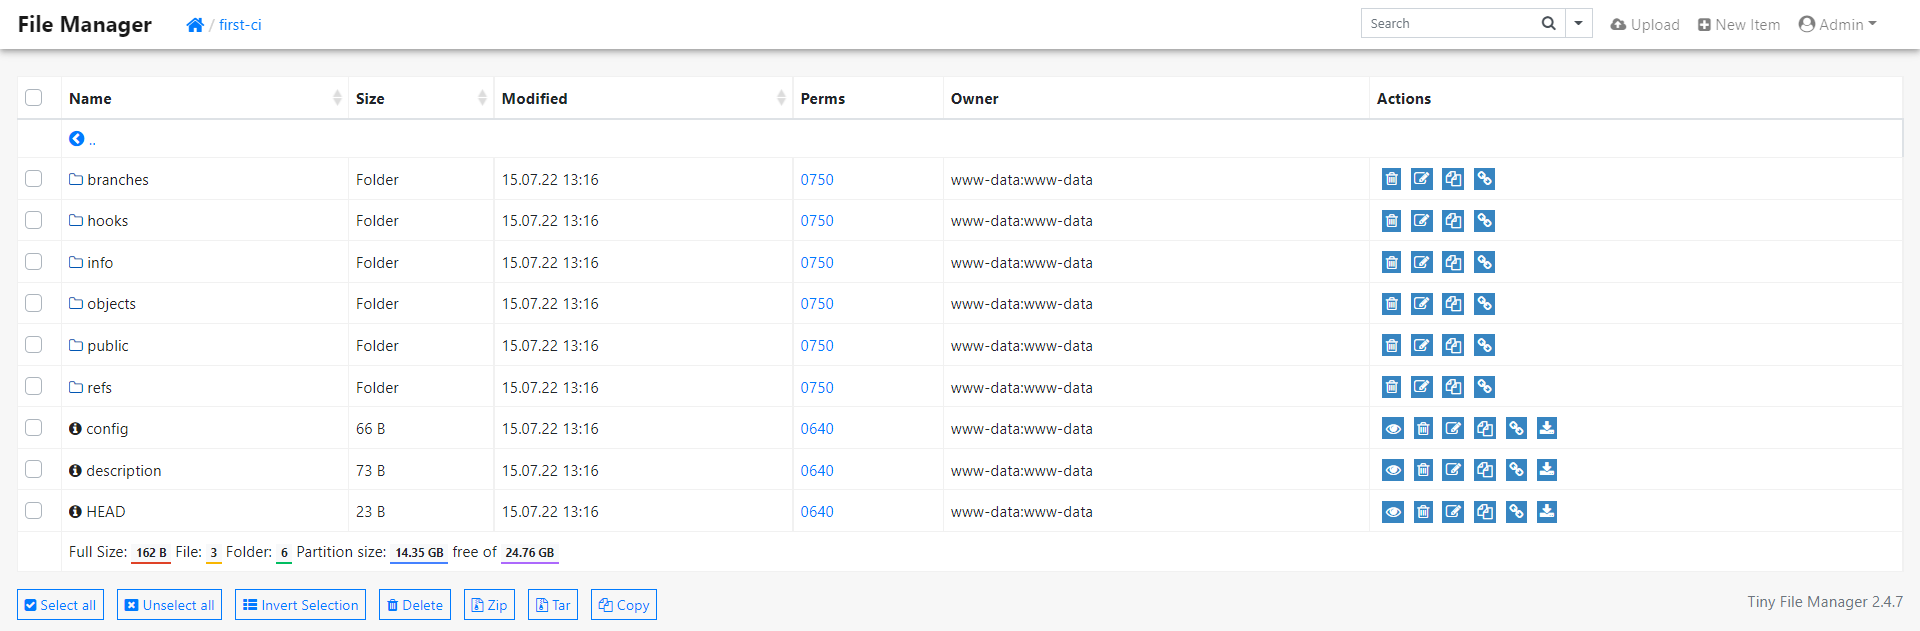
Now, move all files in the "code_igniter-todolist-master" folder to the current public folder.
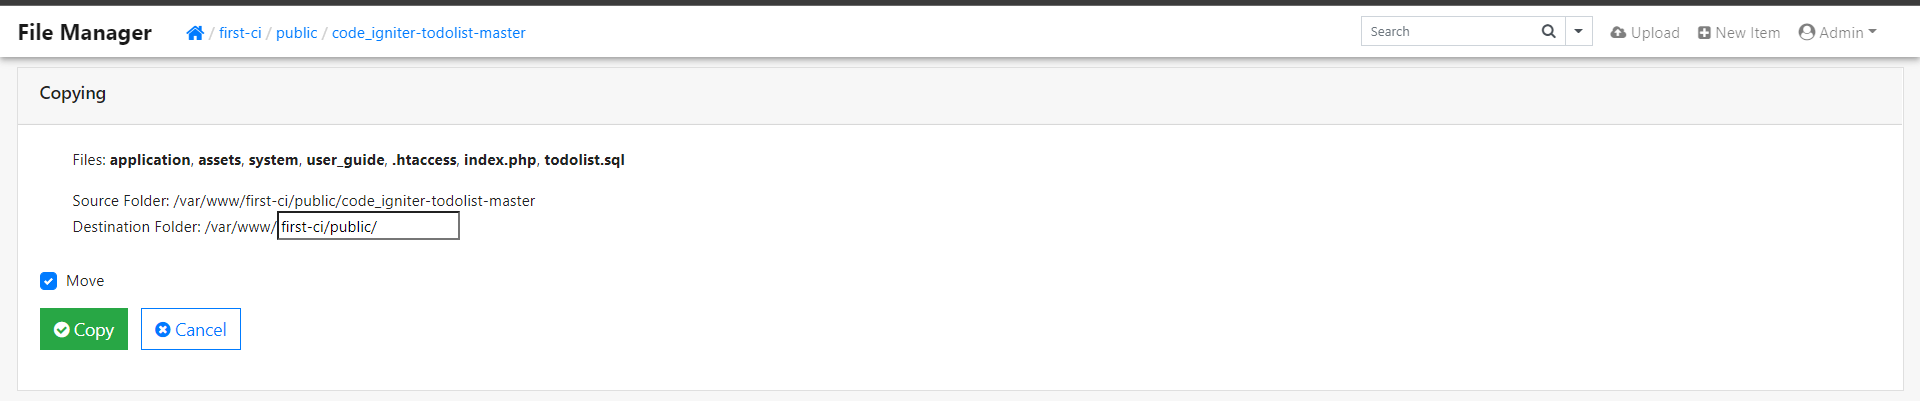
To make it clean, delete the archive file and the "code_igniter-todolist-master" folder. Now the files should be like the image below.
Step 2 - Create & Import Database via phpMyAdmin
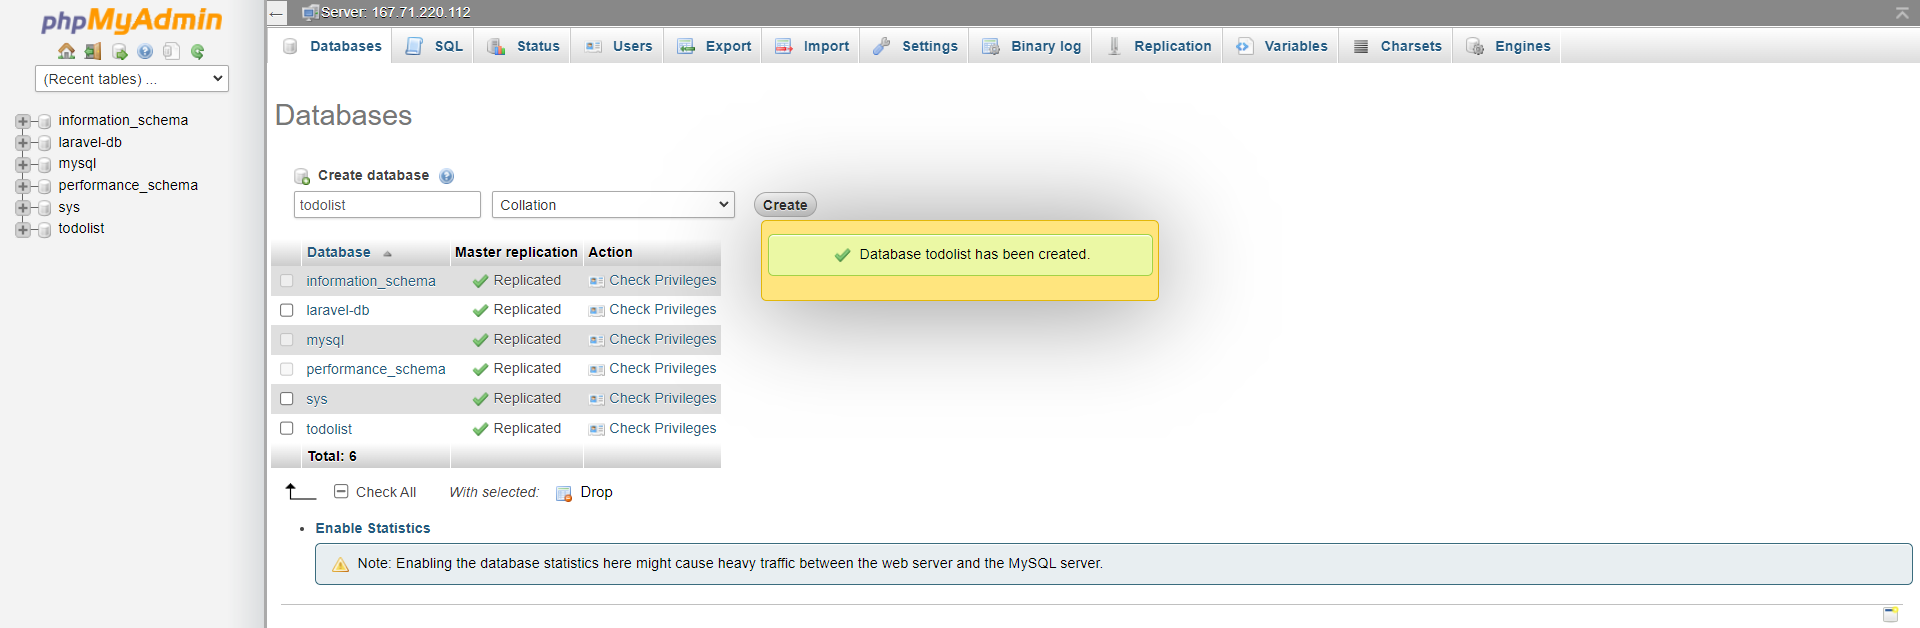
Create a database namely "todolist" via the phpMyAdmin.
Open the database and click the "Import" menu.
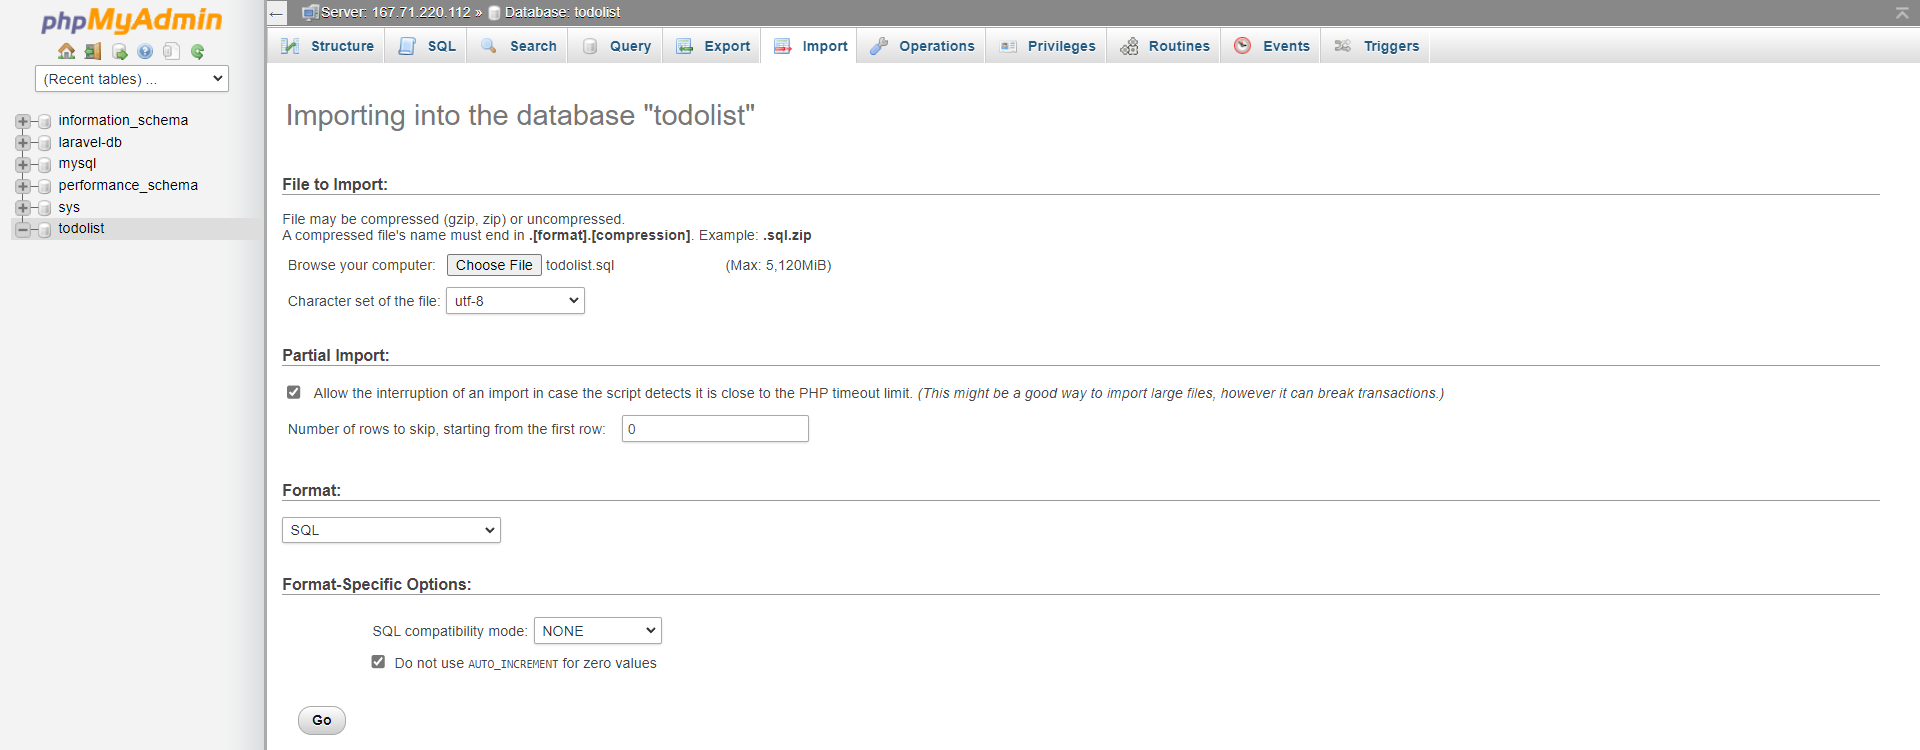
Choose the database file and click the "Go" button. You should see the success notification like the image below.

Step 3 - Configure the Application
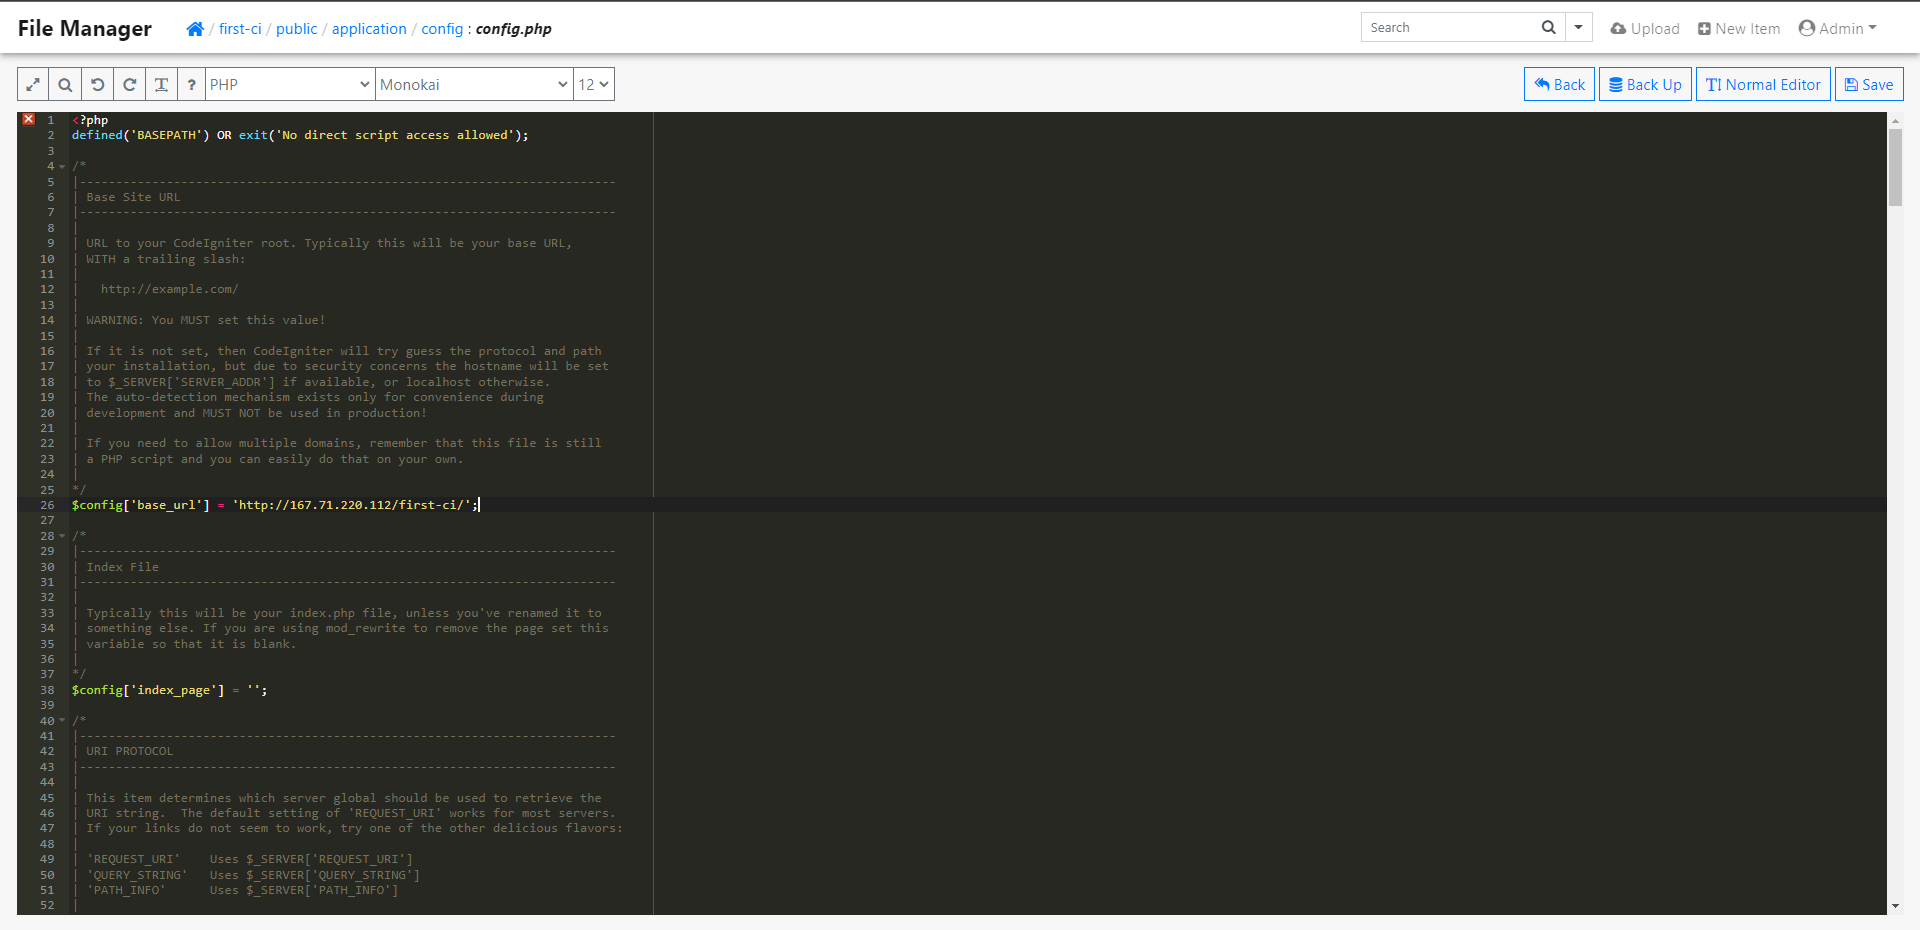
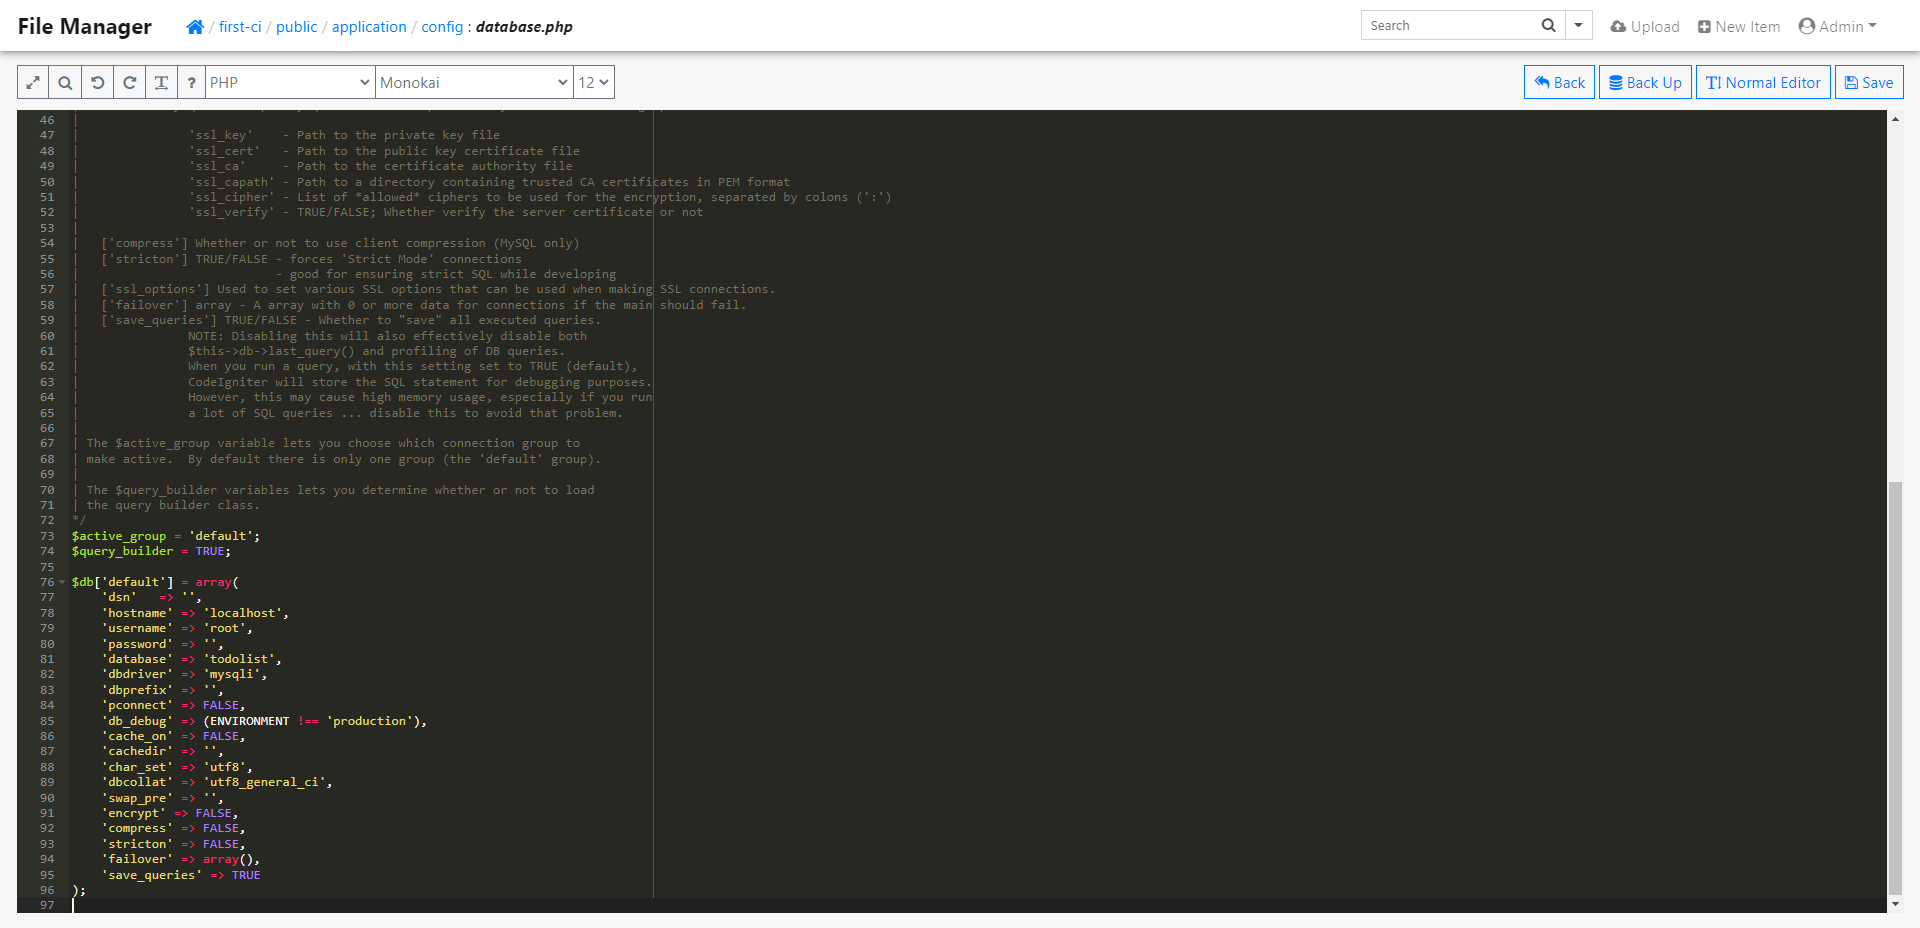
Firstly, you need to set the new base_url config by editing this file application/config/config.php. The base_url value should be your application URL, in this guide is http://167.71.220.112/first-ci/. Don't forget to save the file.
Next, you need to set the new database config by editing this file application/config/database.php.
The hostname, username, and password value should match the database credentials provided on the Paas.id server database page.
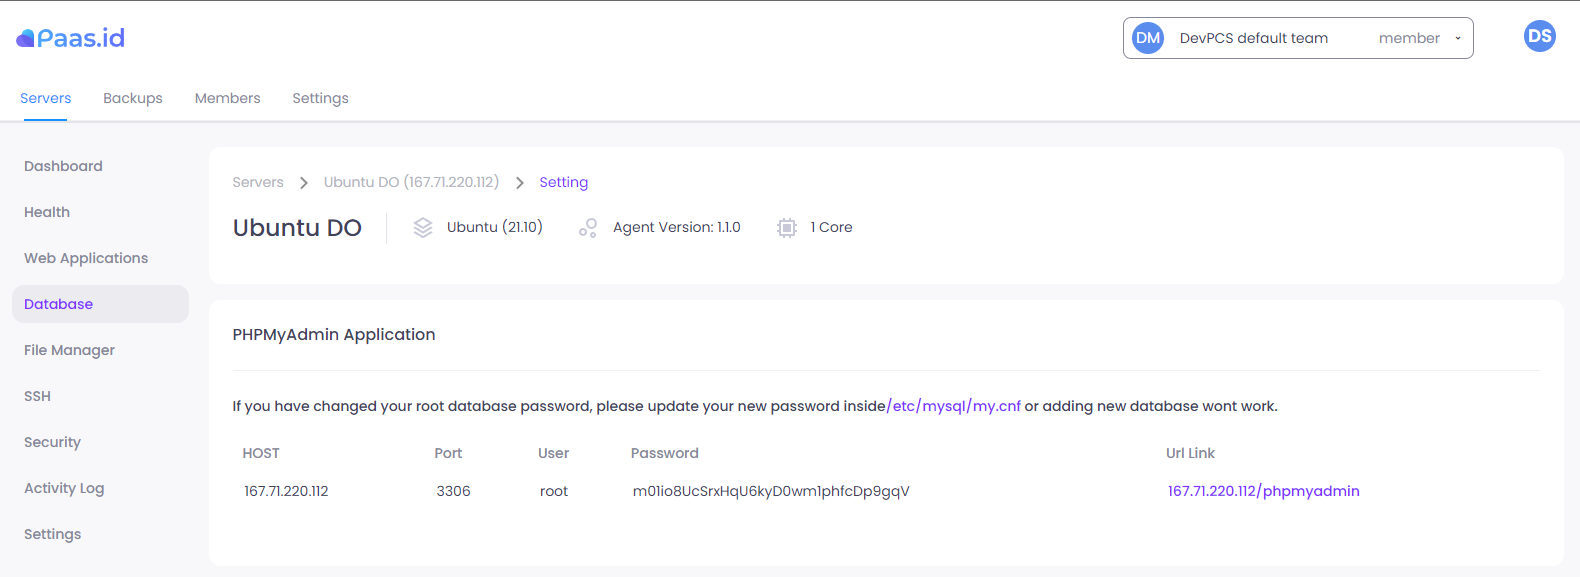
The database value should be "todolist". The database config script should be like the image below.
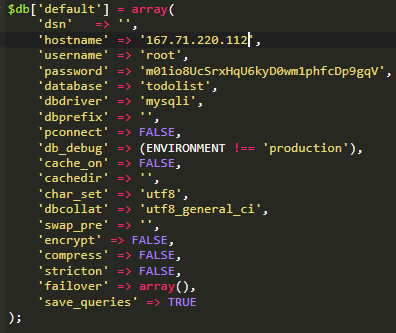
Don't forget to save the file.
Notes: if you want to remove index.php from any application's URL you need to set the index_page config to blank in application/config/config.php. After that, you should follow the guide from CodeIgniter's official documentation that we provide below.
Step 4 - Test the Application
Now visit your application and the page should be like the image below.
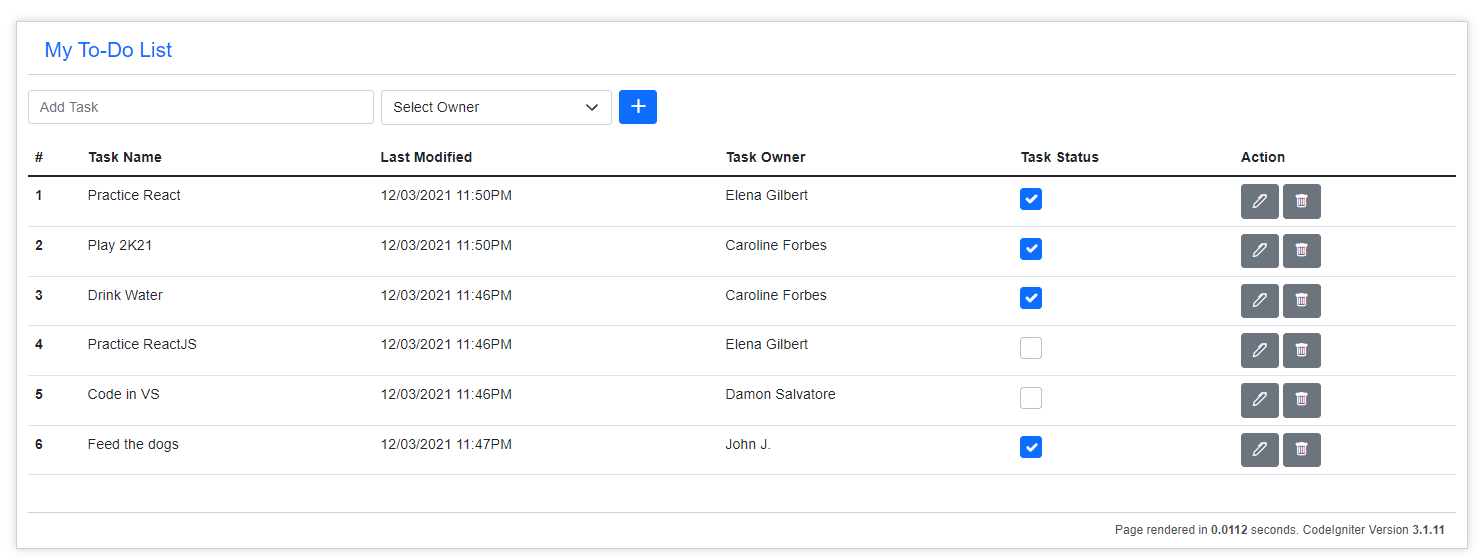
Voila, the CodeIgniter project is deployed and it's works!
Furthermore, you can follow the guide below if you want to add a domain to your application.

Don't forget to change the base_url config in application/config/config.php