How to Connect a Server in PAAS

Introduction
Connecting a server is the first step in order to be able to use every feature that is in PAAS.
This guide will explain how to connect a server that you have in PAAS in order to use every feature available.
Prerequisites
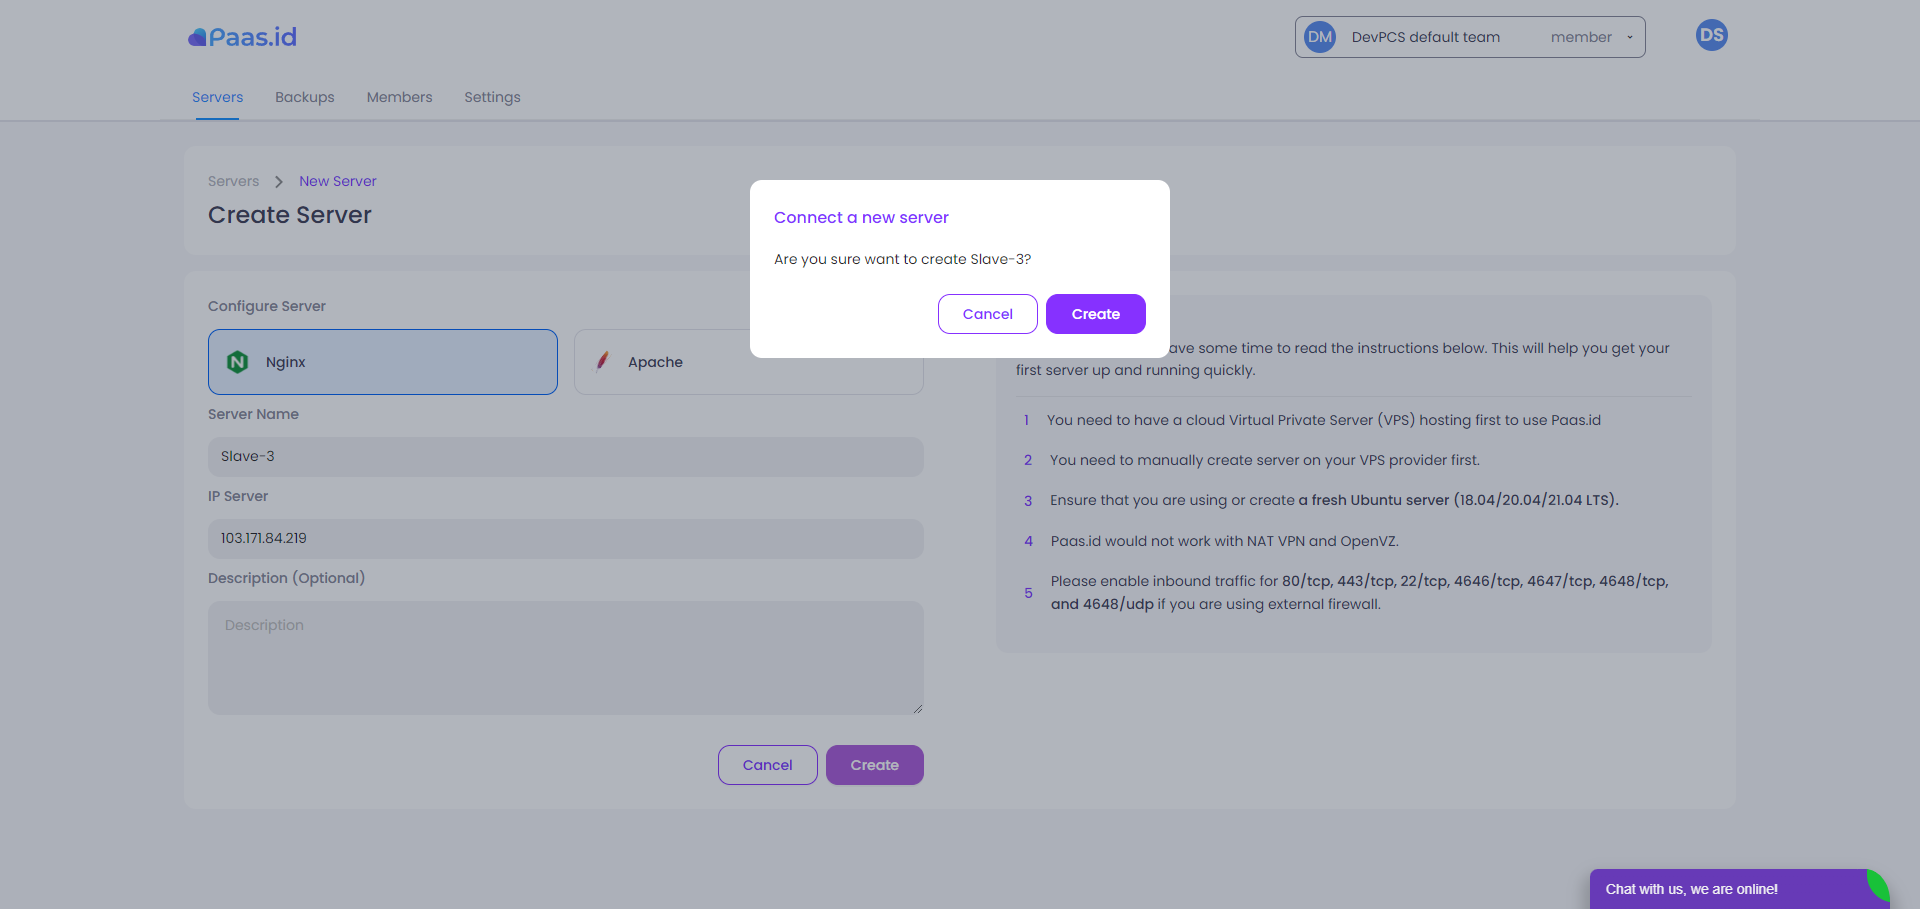
- You need to have a cloud Virtual Private Server (VPS) hosting first to use Paas.id
- You need to manually create server on your VPS provider first.
- Ensure that you are using or create a fresh Ubuntu server (18.04/20.04/21.04 LTS).
- Paas.id would not work with NAT VPN and OpenVZ.
- Please enable inbound traffic for 80/tcp, 443/tcp, 22/tcp, 4646/tcp, 4647/tcp, 4648/tcp, and 4648/udp if you are using external firewall, you can follow our guide on How to Open Port on Server.
Connect a New Server
The first step is that you have to click the Connect a New Server button.

After that you will see the Create Backup page. You can choose whether you want to use Nginx or Apache server configuration.
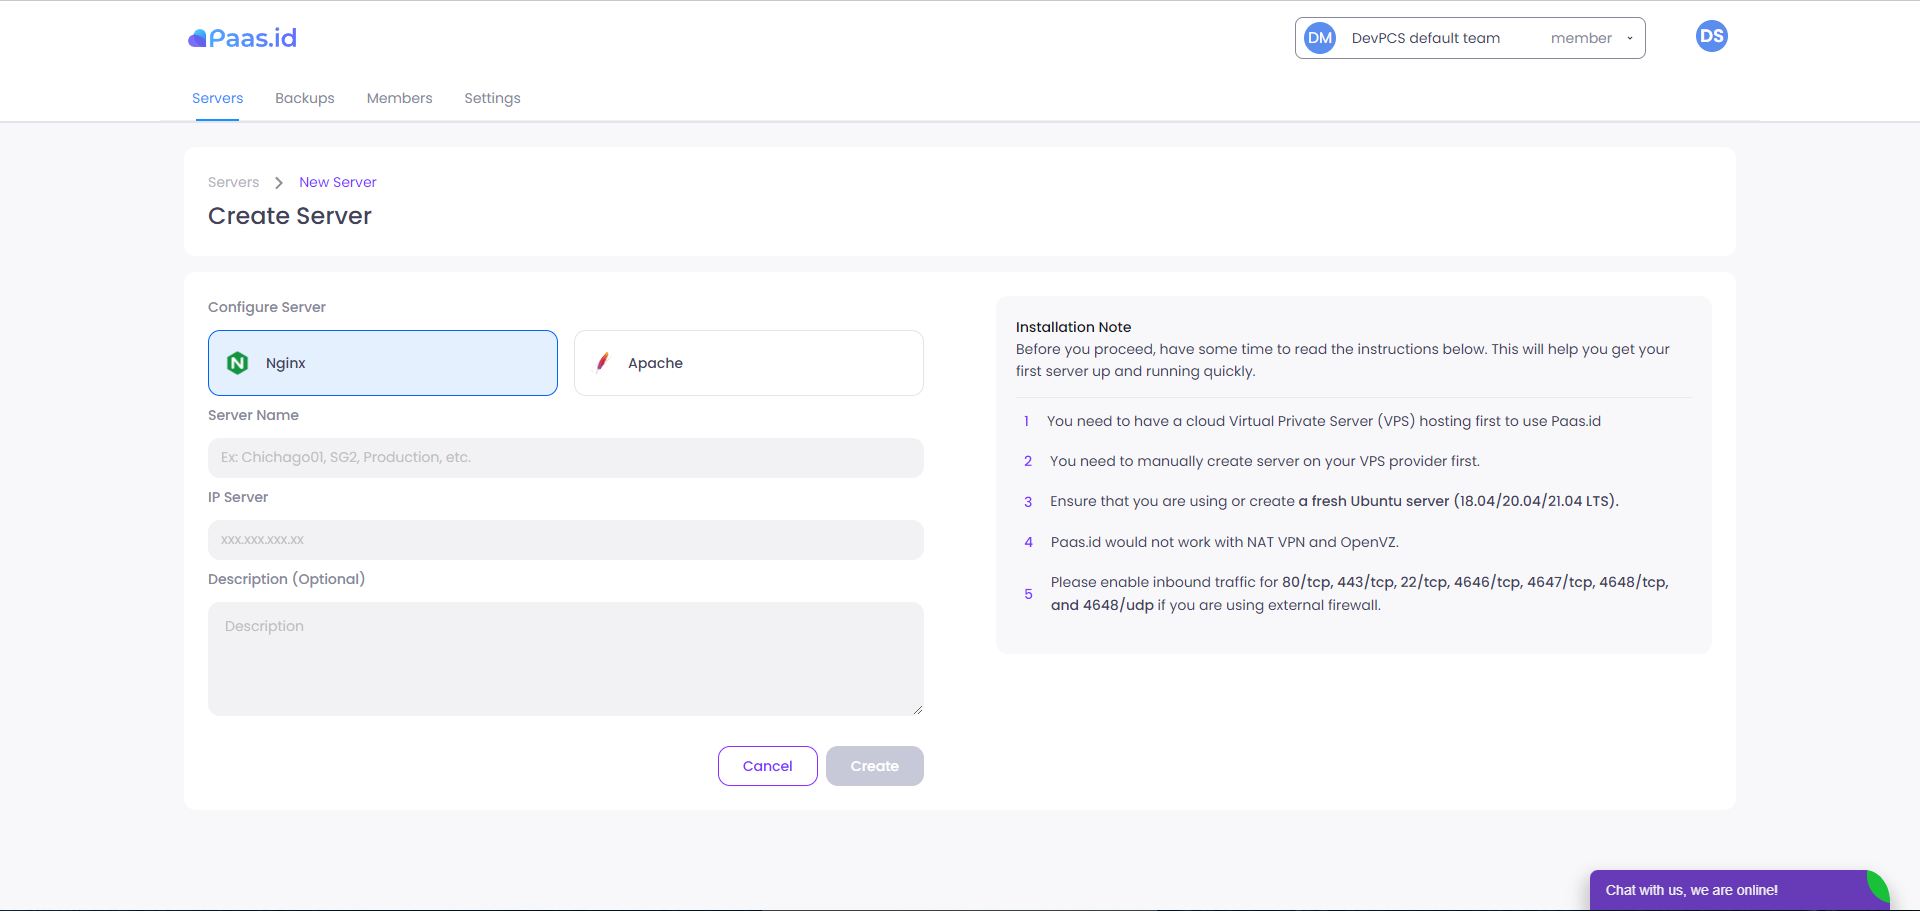
After choosing between them, next you have to enter the server name in the Server Name field. You are free to name your server what you want.

After naming your server, the next step is to write down your public server IP.

In the description field you are optional to fill it. It's okay if you don't want to fill in that description.
When you are finished, then you click the Create button.

After that a pop up will appear to assure you that you will actually create the server. If you are sure, then just click the Create button.
After that you will be directed to the following page. On this page you enter your Username and Password so that PAAS can connect to your server via SSH.
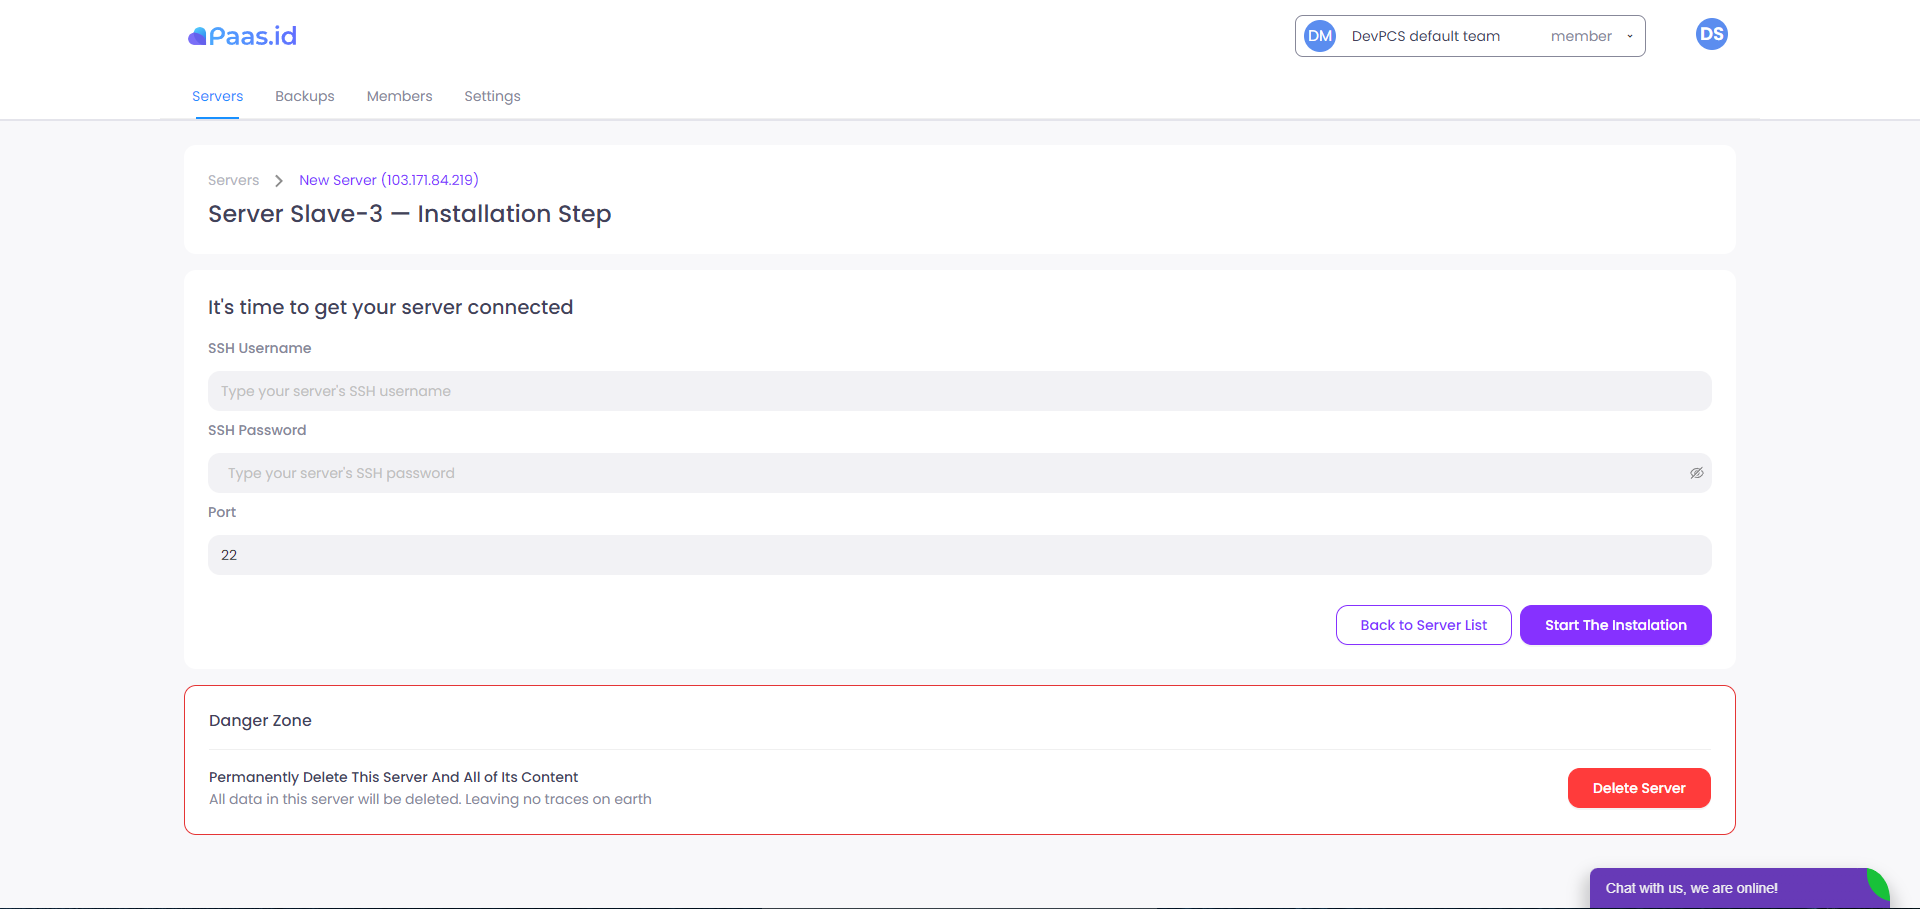
If your Username and Password have been filled in, then you click the Start The Installation button.

You will be redirected back to the main PAAS page. There you will see the server you just created with the On Install status.
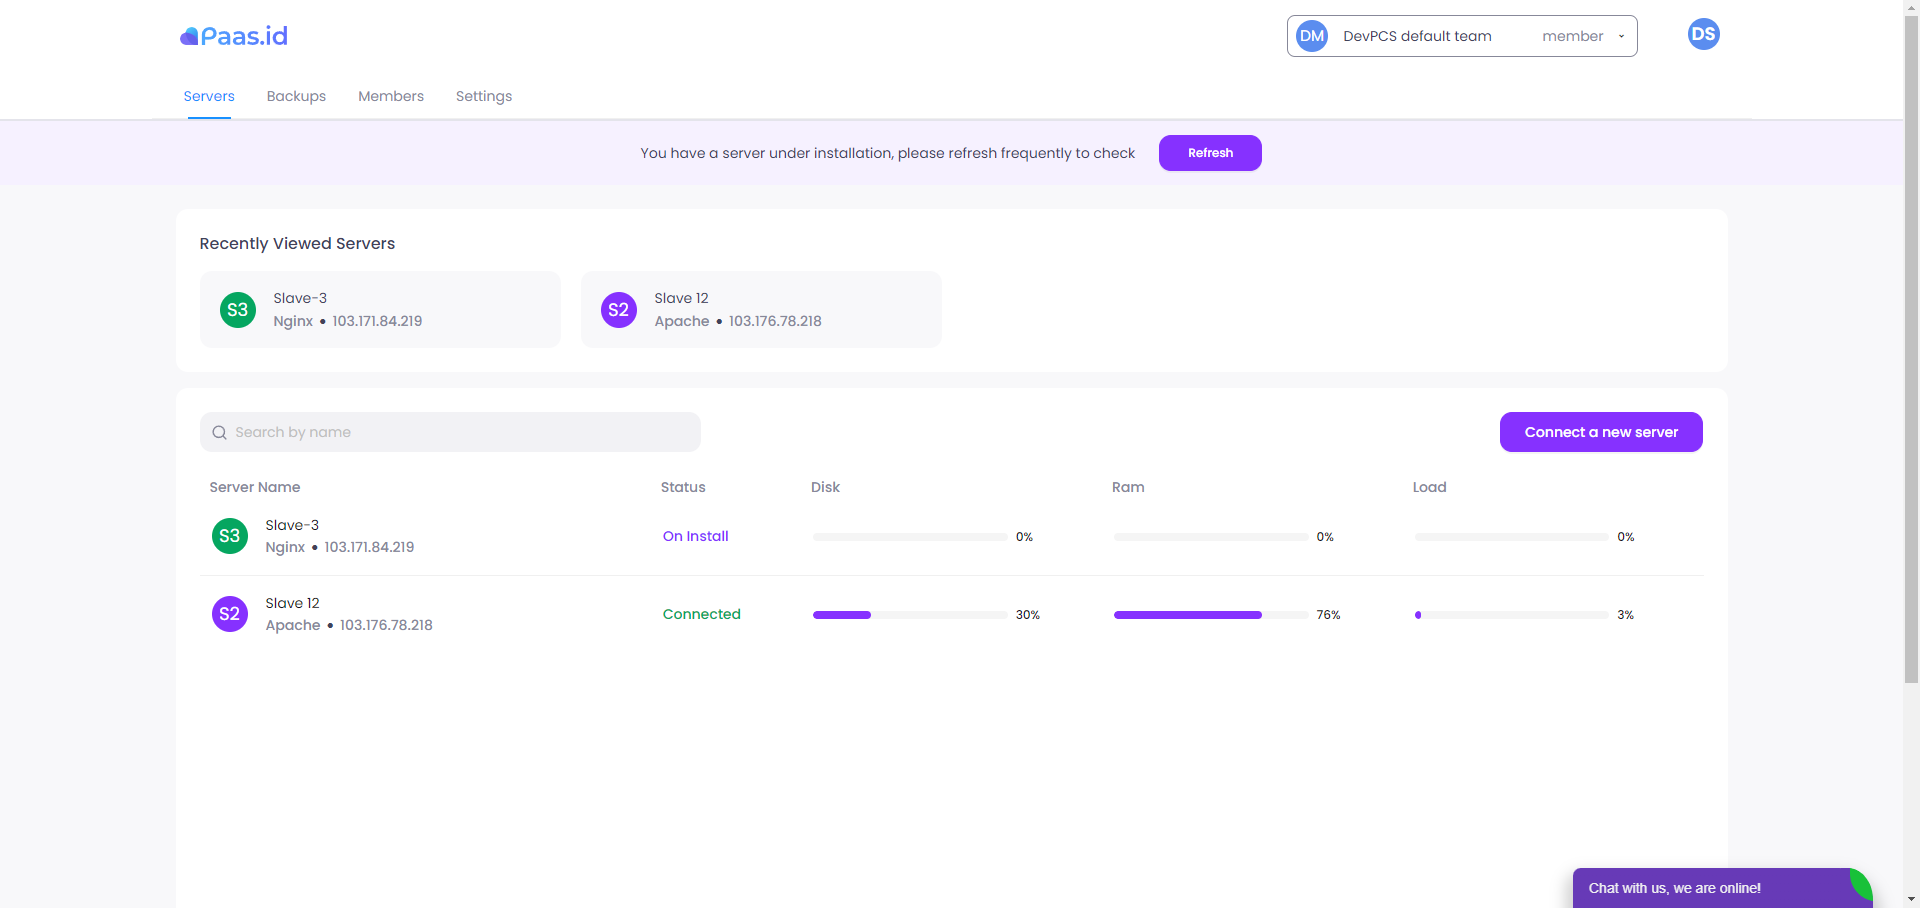
Click the refresh button if you want to refresh the server installation status.

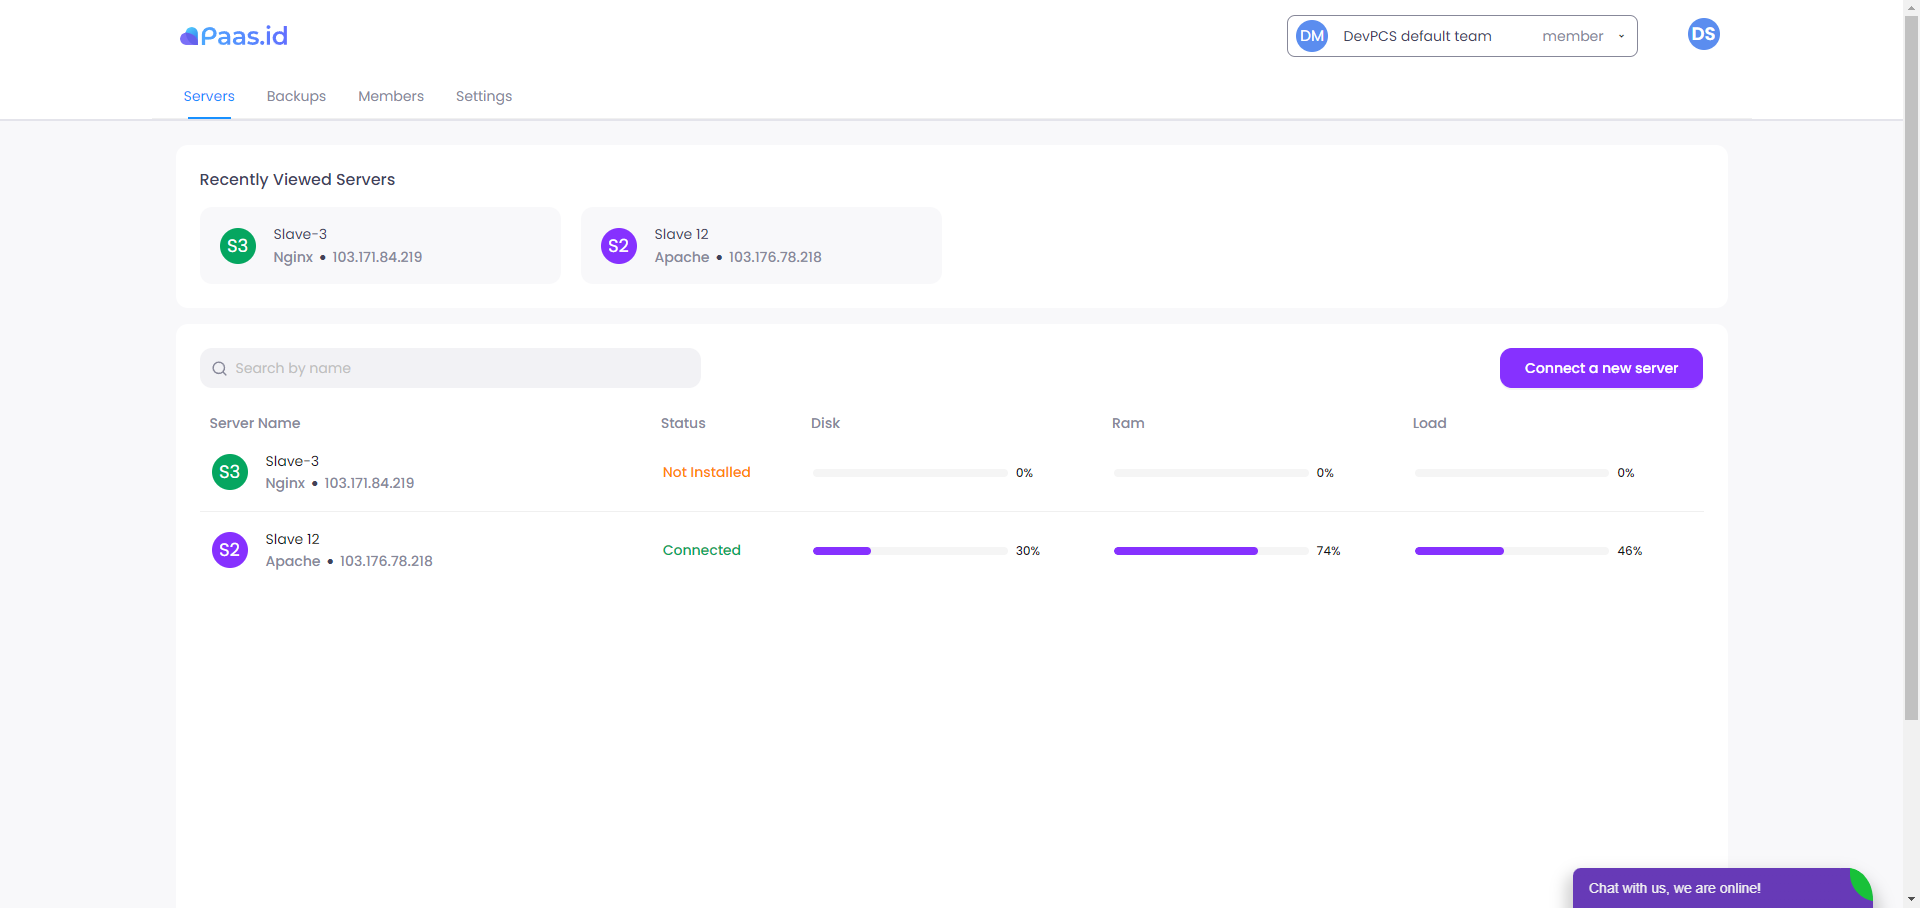
If the server is successfully installed, the status will change to Connected. If it fails, then the status will change to Not Installed.
If the server status is Not Connected, you can try to reconnect it by clicking on the server that is not installed and then re-enter your SSH username and password then click Start The Installation again.

Component on the Servers Page
This section will explain what components are on this server page in general. If you want to know more detailed server features, you can follow our guide regarding Look Around the Menu and Features on the Server.

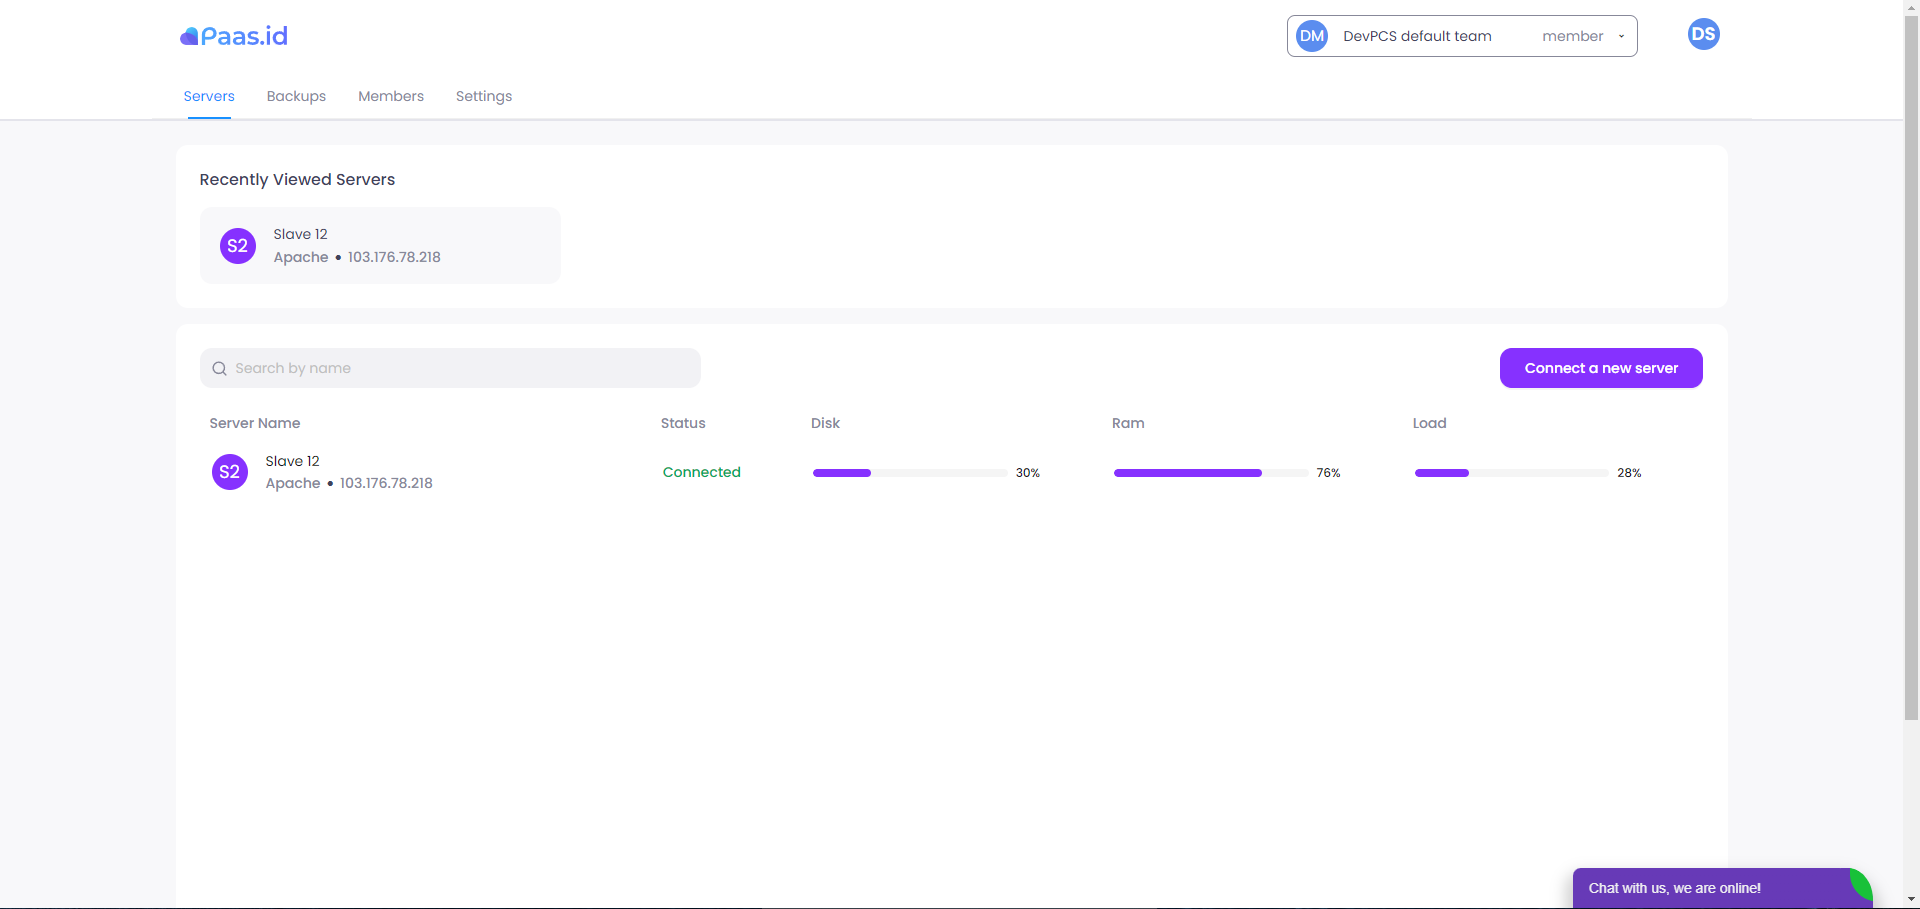
Recently Viewed Servers
Recently Viewed Servers is a component that displays the most recently viewed servers.
Search Bar
This Search Bar is used to search for existing servers. How to use it by entering the server name.
Field of List Servers
Basically, this component will display a list of servers that have been made, both connected and not connected. But you need to know, that in this list there are fields that have quite important information.
- Server Name
This field displays the name of the server that was created - Status
This field displays the status of each server. If the server is connected, then the status is Connected. However, if the server is not connected, then the status is Not Installed. - Disk
This field displays how much disk is being used on the server. - Ram
This field displays how much RAM is being used on the server. - Load
This field displays how much CPU usage on the server.